Leather recliners offer comfort and style, but a tear can mar their appearance and functionality. Experts like Andy Richards, a renowned furniture repair specialist, say, "Knowing how to fix a tear in a leather recliner can save you money and extend its life." This insight emphasizes the importance of addressing damage early. Aesthetic and structural integrity can transform an old recliner into a centerpiece of your living space.
When facing a tear, many feel overwhelmed. Armed with the right techniques and tools, anyone can tackle this issue effectively. Utilizing materials matched to your recliner's color and texture enhances the repair process. Step-by-step guidance can empower you to restore your piece confidently. Every repair situation offers learning moments, even if the end result isn’t perfect. This journey can deepen your understanding of leather care.
As you delve into fixing your recliner, remember that patience is crucial. Each tear tells a story. By learning how to fix a tear in a leather recliner, you are taking ownership of your furniture, valuing its history, and investing in your home. Embrace the process, and don’t shy away from imperfections; they are part of the charm.
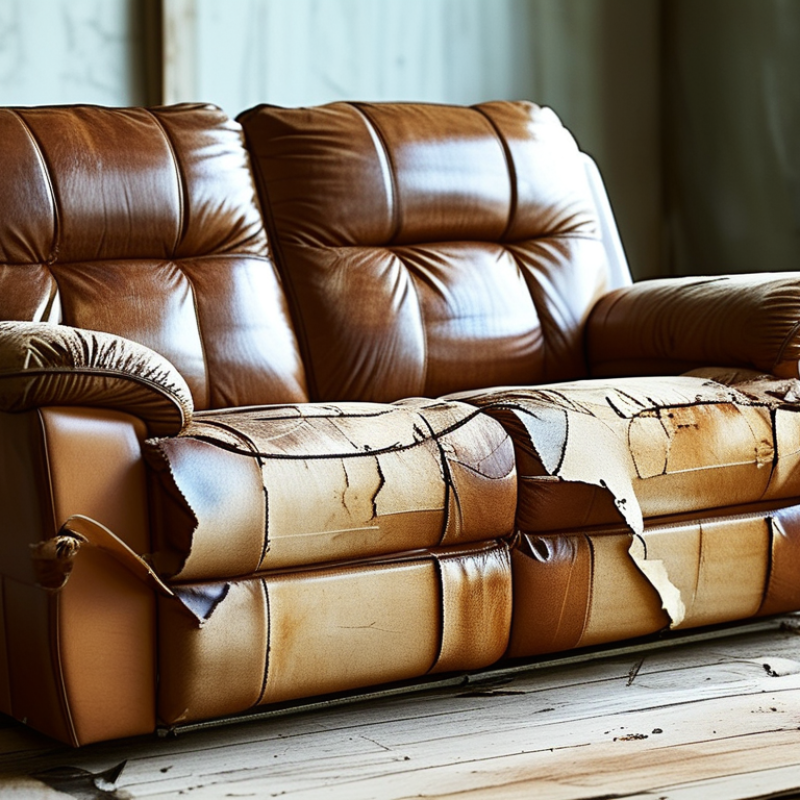
Assessing the damage on your leather recliner is the first crucial step to fixing a tear. Look closely at the tear’s size and location. Is it a tiny puncture or a long gash? A larger tear might need more attention than a small one. Carefully examine the surrounding leather for any signs of cracking or fading. Damaged leather could lead to further deterioration if not addressed quickly.
Understanding the type of leather is also essential. Different leather finishes respond differently to repairs. For instance, top-grain leather is more durable but often challenging to repair. On the other hand, bonded leather may be easier, as it allows for quick fixes. Wrinkles and creases in the leather can indicate wear and tear, which might require further assessment. Remember, not all tears are meant to be fixed perfectly. Some might need a simple patch, while others require more elaborate methods.
Taking the time to assess the problem will pay off in the long run. Rushing into repairs can lead to mismatched colors and textures. Embrace the imperfections, and remember that a well-loved recliner might tell a story through its wear. Repairing it is not just about aesthetics; it's about restoring its comfort and functionality.
When repairing a tear in your leather recliner, selecting the right materials is crucial. Start by choosing a leather repair kit that matches your recliner's color. Look for kits with leather glue, patches, and color compounds. These ingredients can help you achieve a seamless repair. It’s essential to test the color on a hidden area first. This step prevents unpleasant surprises after the repair.
Consider the type of leather your recliner is made from. Different leathers require different approaches. For example, top-grain leather may need a different adhesive than bonded leather. Familiarizing yourself with these differences can make or break your repair attempt. In some cases, imperfections in your application may leave noticeable spots. It’s important to approach the process with patience, as haste can lead to unsatisfactory results.
Gathering the proper tools is just as important as the materials. You might need sandpaper, a clean cloth, and a smooth applicator for the repair. An imperfect blend of the patch and the original leather can disrupt the texture. Sanding lightly before applying the repair material can help. The goal is to create a smooth transition between layers. Each step contributes to a successful outcome, but it's okay if it doesn’t turn out perfect. Learning from these experiences can lead to better results in future repairs.
Repairing a tear in a leather recliner can be a rewarding project. Start by gathering your materials. You will need a leather sewing needle, strong thread, and a pair of scissors. Choose a color that matches your recliner. Having a clear workspace will make the task easier.
Next, assess the tear's size and shape. If it’s jagged, trim any loose edges first. This ensures clean stitching. Thread the needle and knot securely. Begin sewing from the inside of the tear, making small, even stitches. Keep the stitches close to the edge of the tear to maintain a neat appearance. Remember, uneven stitches might make the repair noticeable, so take your time.
After stitching, consider applying a leather conditioner to restore the material's texture and shine. This step protects your work. Inspect the area for any missed spots or loose threads. Reflection is key; this can help you identify improvement areas for future repairs. Learning from each experience will enhance your skills over time.
Tears in leather recliners can be frustrating. They not only damage the aesthetic but also reduce comfort. Using leather patches is an effective method for larger tears.
First, choose a suitable leather patch that matches your recliner's color and texture. Cut the patch slightly larger than the tear. Clean the area around the tear thoroughly. This step ensures proper adhesion. It may take time to find the right adhesive.
Once you're ready, apply the patch smoothly. Avoid air bubbles—these can make the repair visible. Let it cure for the recommended time. A small slip can ruin the look.
After the patch is in place, consider using a leather conditioner. This step helps to blend the edges and restore suppleness. Observing the patch in different lights can show imperfections. A common struggle is achieving a seamless look, but patience and practice pay off.
| Tip Number | Tip Description | Expected Outcome |
|---|---|---|
| 1 | Clean the Tear Area | Remove dirt and oils to enhance adhesion. |
| 2 | Choose the Right Leather Patch | Ensure a perfect color and texture match. |
| 3 | Cut the Patch Appropriately | Size should exceed the tear by at least an inch. |
| 4 | Use Strong Adhesive | Select leather-specific adhesive for durability. |
| 5 | Apply Adhesive Evenly | Ensure complete coverage for a strong bond. |
| 6 | Press the Patch Firmly | Create a secure and level surface. |
| 7 | Allow Adequate Drying Time | Ensure the adhesive sets well for longevity. |
| 8 | Trim Excess Material | Achieve a neater appearance post-repair. |
| 9 | Apply Leather Conditioner | Restore moisture and maintain flexibility. |
| 10 | Regular Maintenance | Prevent future tears and extend the chair’s life. |
After repairing a tear in your leather recliner, sealing and conditioning are vital. A proper seal protects your repair work, ensuring longevity. Start with a high-quality leather adhesive or patch. After curing, apply a protective leather sealant. This forms a barrier against moisture and dirt, enhancing durability.
Conditioning is equally crucial. It keeps the leather supple and prevents cracking. Use a leather conditioner free of harsh chemicals. Apply it evenly across repaired areas and the surrounding leather. This revives color and luster. It also reduces the visibility of the repair, blending it with the rest of the chair.
Remember, the key is not just fixing the damage but maintaining the overall health of your leather recliner. Some repairs may still show slight imperfections, which is okay. It serves as a reminder of your journey in taking care of your furniture. Regular conditioning throughout the year will keep your recliner looking its best, ensuring comfort and style for years to come.
: You will need a leather sewing needle, strong thread, scissors, and a matching color for your recliner.
Assess the tear's size and shape. Trim any loose edges for clean stitching.
Start sewing from inside the tear, making small, even stitches close to the edge.
Take your time. Avoid uneven stitches that can make the repair noticeable.
It restores texture and shine, protecting your work from damage over time.
Use a leather patch. Match the color and texture, and cut the patch larger than the tear.
Clean the area, apply the patch smoothly, and avoid air bubbles for better adhesion.
Seal the repair with a protective sealant and condition the leather regularly to prevent cracking.
It's okay. Imperfections remind you of your efforts in maintaining the furniture.
Regular conditioning throughout the year keeps it looking its best and ensures comfort.
If you're looking to learn how to fix a tear in a leather recliner, the first step is to assess the damage, which helps you understand the specific tears and their severity. Once you've evaluated the damage, selecting the right materials for the repair is crucial. Follow a step-by-step guide to stitch smaller tears effectively, ensuring a seamless repair.
For larger tears, using leather patches can be a practical solution that restores the recliner's appearance. After completing the repair, sealing and conditioning your leather recliner will help protect it from future damage and keep it looking new. With these tips in hand, you can confidently tackle the task of repairing your leather recliner and extend its life significantly.
